Simple Animations for Non-Animators
A practical guide to making simple animations with Keynote, Illustrator, and Photoshop.
Note (2026): I wrote this guide in 2021. Now that AI is eating the world, this workflow is probably not the fastest way to make simple animations anymore. Keeping it here for posterity.
This is a hurriedly thrown together guide for making simple animations for non-animators. I put this guide together at the request of current Launch School Capstone members who wanted to know how my group made animations for our presentation and writeup. You can checkout my group’s project site (https://ekko-realtime.com/) if you want to get an idea for the scope of animations this guide can help you make.
Who is this guide for?
This guide is specifically written for Launch School capstone members who are currently working on their presentation and writeup. Technically none of this information is restricted to Launch School students, so it might end up being useful to other people who want to be able to make simple animations without needing to learn an advanced animation software.
What you need
1. Mac
The backbone of this “poor mans” approach to animation is Apple’s Keynote software that is freely available to all mac owners. You can probably do just about everything in PowerPoint, but I haven’t tested that out.
note: If you don’t have a mac, you can potentially rent space on one. Two services that I’ve personally used are MacStadium and MacInCloud. This will actually come up later on for different reasons.
2. Keynote
If you have a mac, you should already have Keynote installed. Just double check to make sure everything is in order.
3. Adobe Illustrator & Photoshop
Don’t worry, you don’t have to learn a whole new software platform, we are just going to use the tiniest bits of both of these programs. Adobe has various free trial and subscription options. If you’re efficient, you should be able to get everything done during the trial period. Worst case scenario, you’ll have to pay for a month which isn’t too bad.
Go to https://www.adobe.com/ and download Photoshop & Illustrator (There might be a better way, but I usually download the “creative cloud” app which manages the downloads for other adobe software).
4. Icons to animate
You’re gonna need something to animate, so go ahead and grab a few icons.
Bitmap vs. Vectors, In general there are 2 types of image formats: bitmaps (.bmp, .gif, .png, .jpg, …) and vectors (.svg, .ai, .eps, …). You can dig into this if you want to, but the key takeaway is that vector images don’t get blurry when you enlarge them, and they are easier to change the colors on. For those 2 reasons you should pretty much only use vector images for your presentation and writeup.
AWS Icons, if your project used AWS, you’re in luck! They have an official icon set (https://aws.amazon.com/architecture/icons/) you can download that has vector (.svg) versions of all of their infrastructure pieces. Make sure you download the Asset Package.
General icons, There are probably dozens of sites out there that have vector images, I personally use The Nouns Project (https://thenounproject.com/) for 99.99% of my vector graphic needs. Think of it as a google image search that only returns vector images 🎉
Editing Icons
Memorize those hex codes
You should have a fancy logo and a few brand colors by now, you should take a moment to write down those color hex codes since you will probably be using them a lot.
Get an icon into Adobe Illustrator
Feel free to use any .svg image for this bit. I’m going to use one of the .svg icons from the AWS asset pack. The easiest way I found to get the icon I wanted was…
- Open the asset pack directory
- Search for the AWS architecture piece AND svg
- Restrict the search to just the asset package
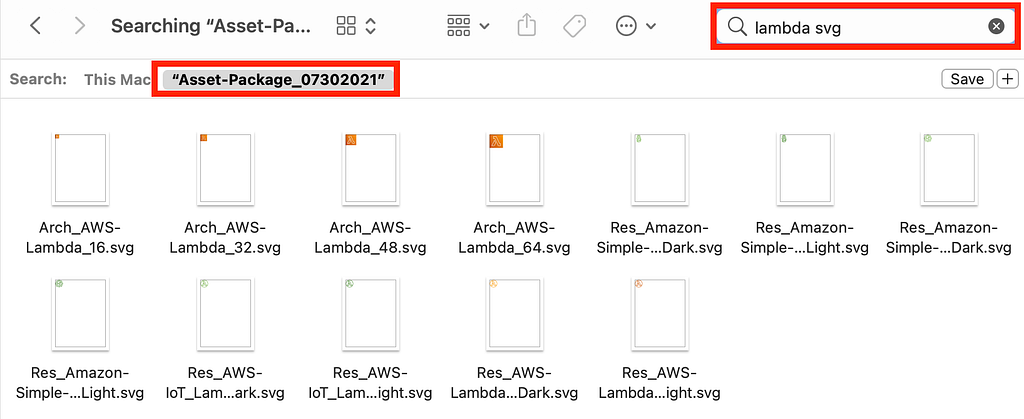
4. In general I used the file with the 64 in the name since it’s the largest and seemed to have the fewest issues when making modifications.
5. There is a good chance Adobe Illustrator set itself as the default for .svg images, so you can probably just double click on the file to open it. If Illustrator is not the default, you can just right-click and open in Illustrator
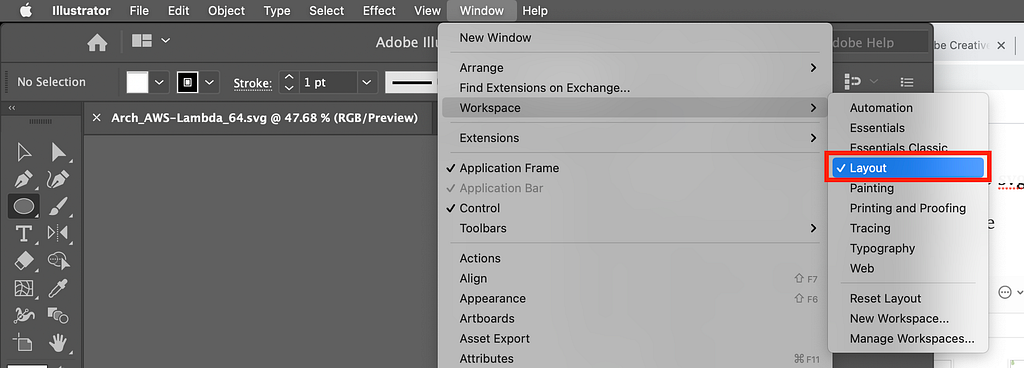
6. I recommend switching the workspace layout to “layout” in illustrator. Most of the controls we want to use are easily accessible in this layout. (If things ever get weird you can always click on the “reset layout” in the same menu to reset everything).
Changing the icon color
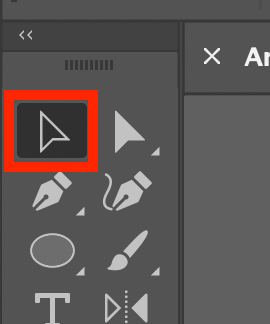
- Click on the “Selection tool” or click “v” which is the shortcut
2. It’s a little confusing, but illustrator can have nested groups of things. If you click on the icon once, it will be selected, but there will be a question mark in the swatched panel. This means that there is more than 1 element in the selected group, so you can’t change the color of it.
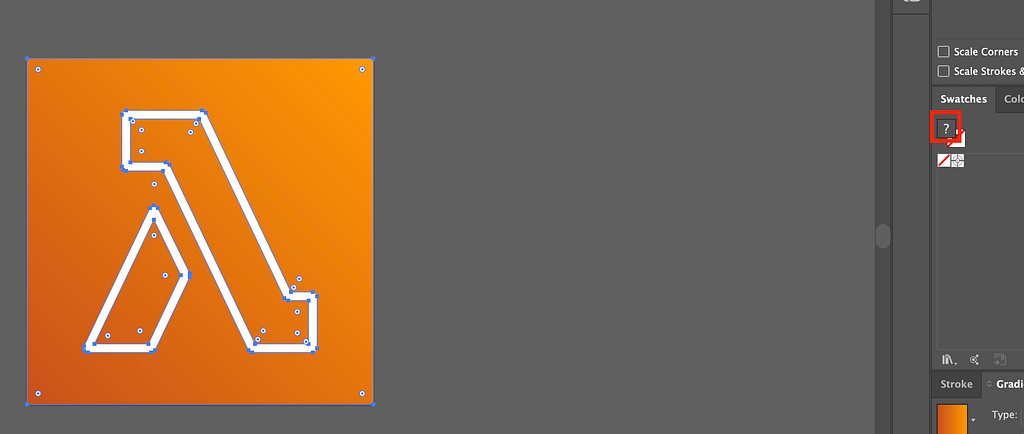
3. I normally do some weird/random combinations of single and double clicks until I select the layer I want within the group. A more predictable way of doing this is to ctrl+click and select “isolate selected group”
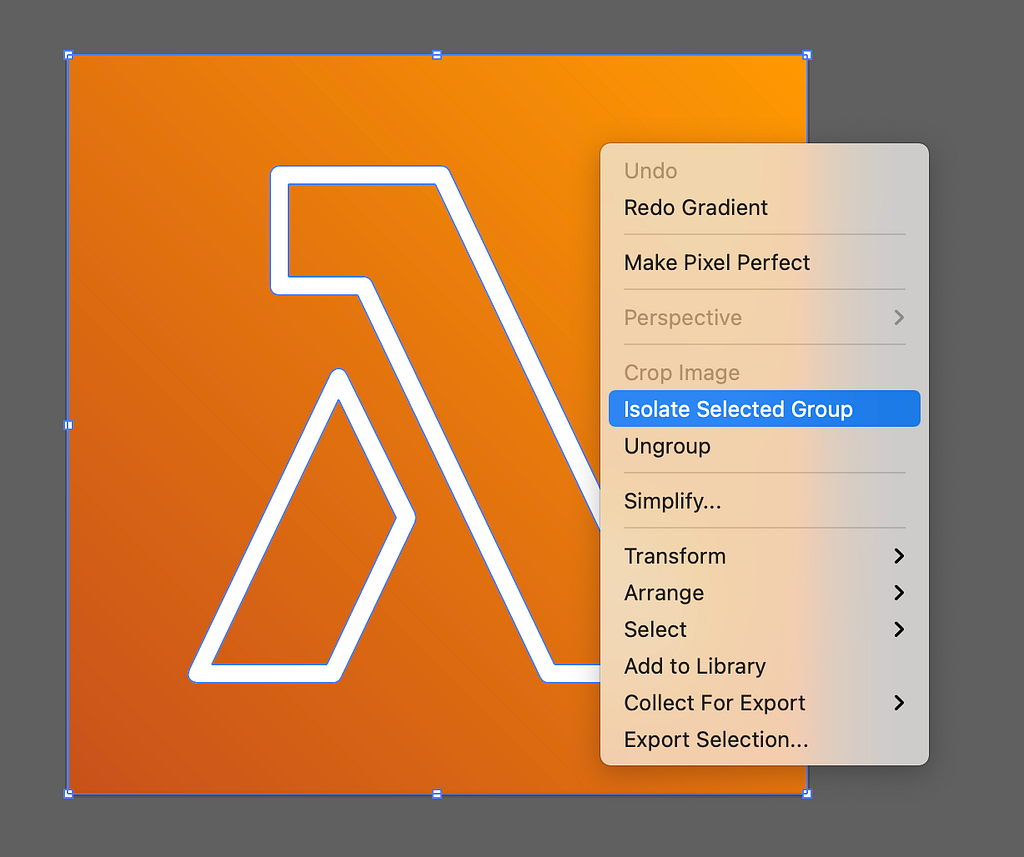
4. If you’ve gotten to the right element, you should now see a color/gradient where the question mark was
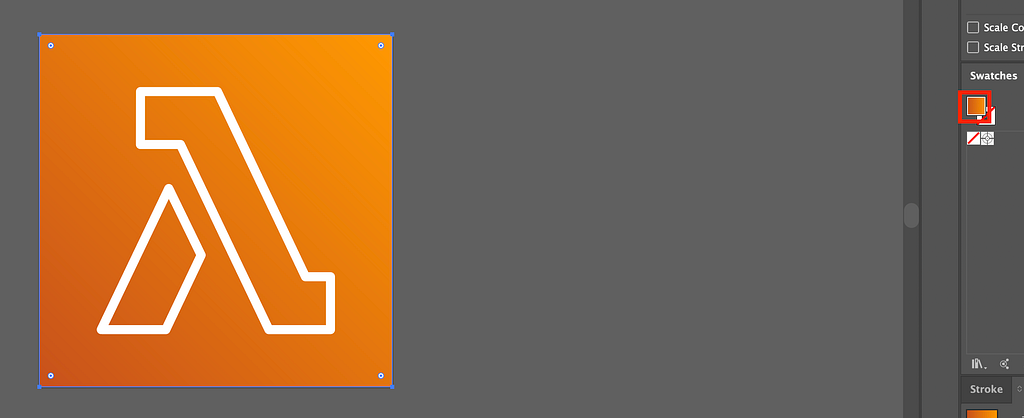
5. Double-click on that color (the one with the red box around it in the above image). This should open up the color picker tool.
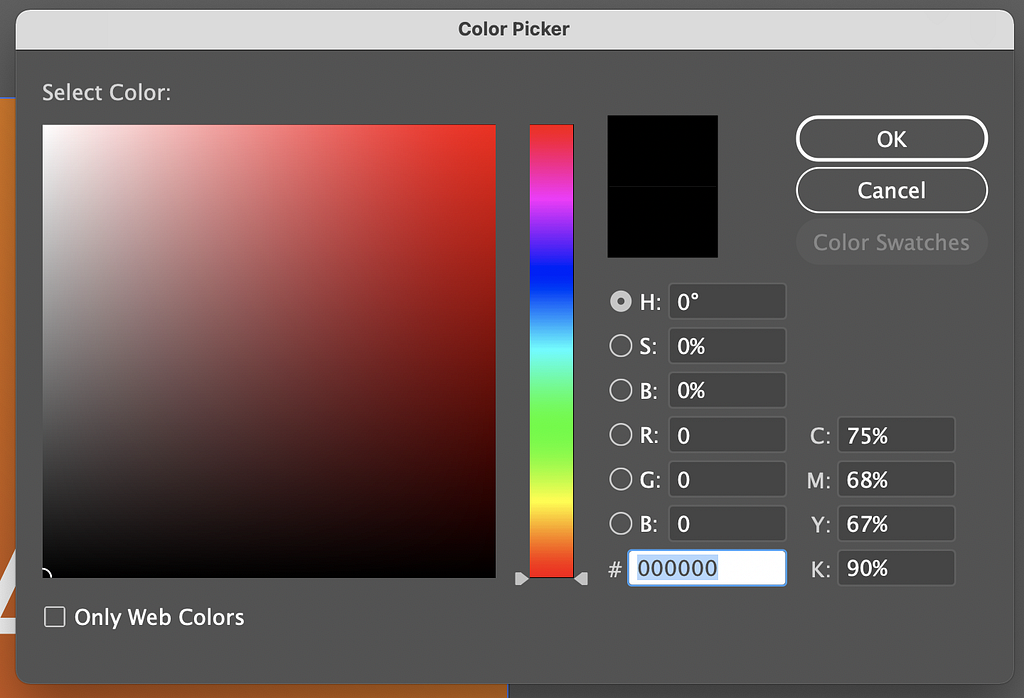
6. You can select any color you want… you should probably use one of those “brand” hex colors you memorized earlier. After you select the color you want, go ahead and click ok to apply it.
🎉 That’s all you have to do to change the icon colors!
Resizing the icon
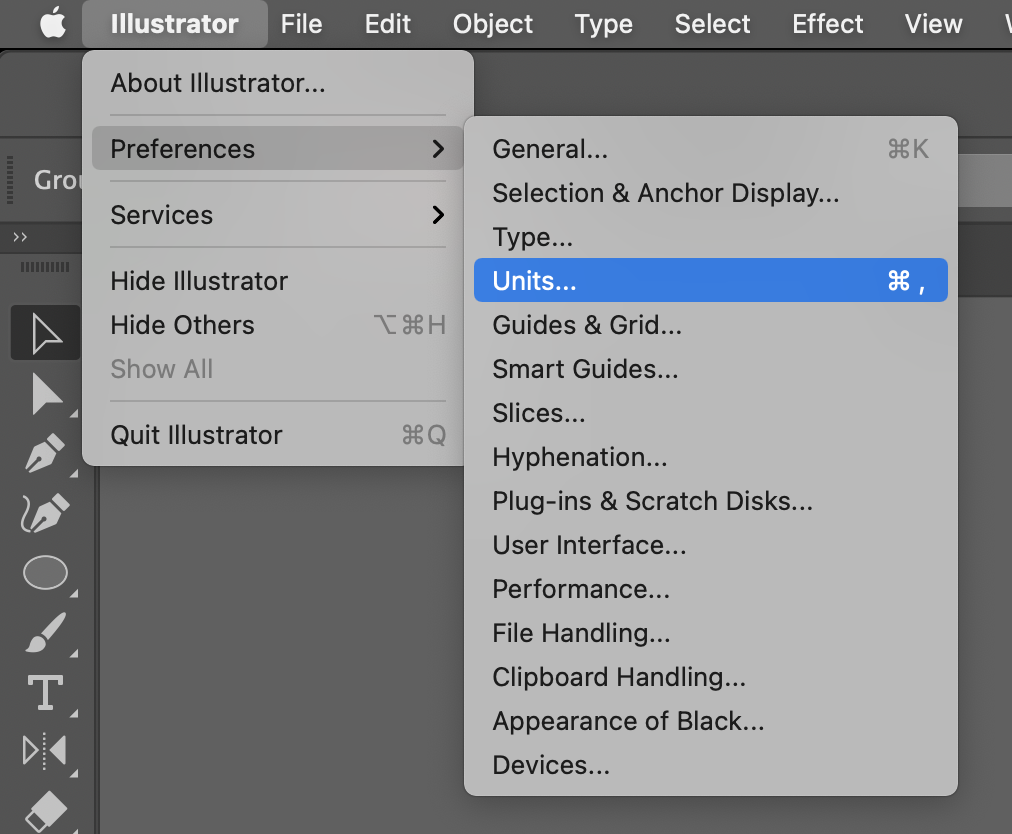
- Change all units from points to pixels. Click on Illustrator > Preferences > units
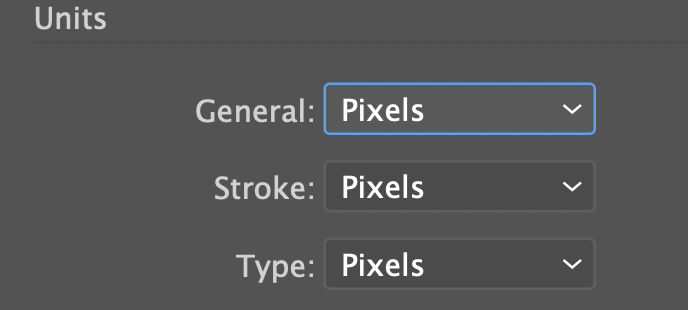
2. Assuming you’re not still drilled into the icon subgroups (mash the esc key or double click outside of the icon to unselect everything)… click cmd+a to select the entire icon. For AWS icons you can simply single click on the icon, but some icons from the noun project aren’t all grouped together, so using cmd+a is a safe bet.
3. Enter the new size you want in the boxes on the transform panel. if you want to maintain the aspect ratio (you almost always do), click the little chain link icon to the right of the W/H boxes. Ideally you should make the icon the exact size you want it to be in Keynote… if you’re not sure, it’s probably better to make it a little larger than needed 🤷♂️
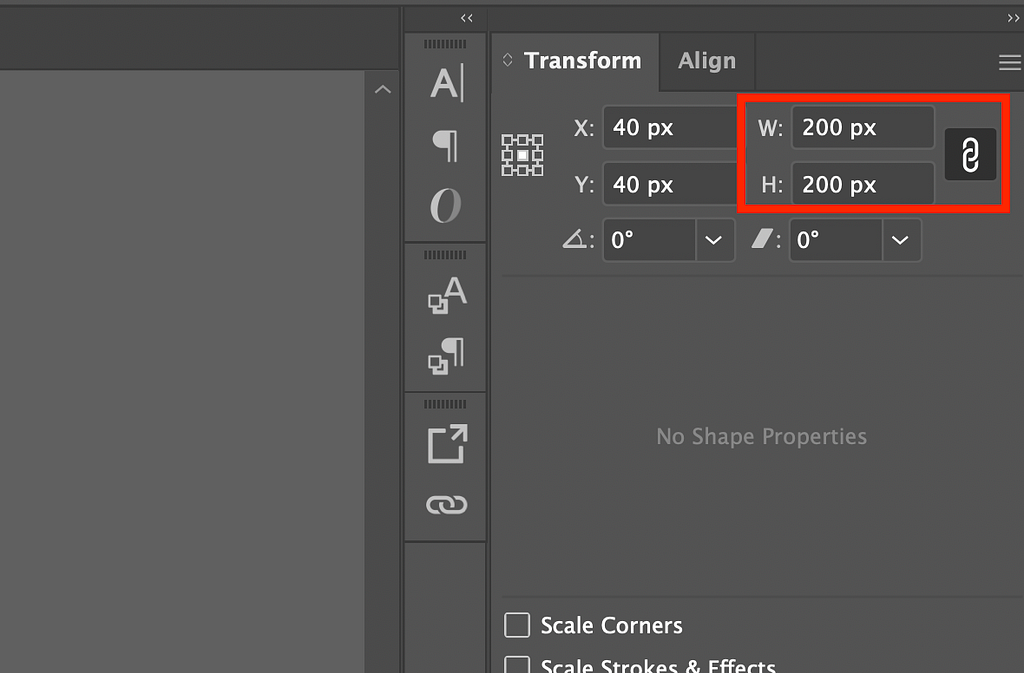
🎉 That’s all you have to do to resize the icon! Technically we made the icon larger than the canvas, but this won’t really hurt anything.
Getting Icons into Keynote
- Select the entire icon in illustrator with cmd+a
- copy it with cmd+c
- paste it into keynote with cmd+v
🎉… yup, that’s it. You technically can export things and do all sorts of other stuff, but doing the simple copy and paste works fine and is faster.
Keynote Shapes
For all the basic shapes and such, simply use the standard shapes and lines that are built into Keynote
Basic Animations
Basic animations are pretty straightforward.
- Click on the newly pasted icon
- click on the animate tab in the top right of keynote
- use build in for how the icon should appear on the page
- use action for animations that should happen after the icon is visible
- use build out for how the icon should disappear
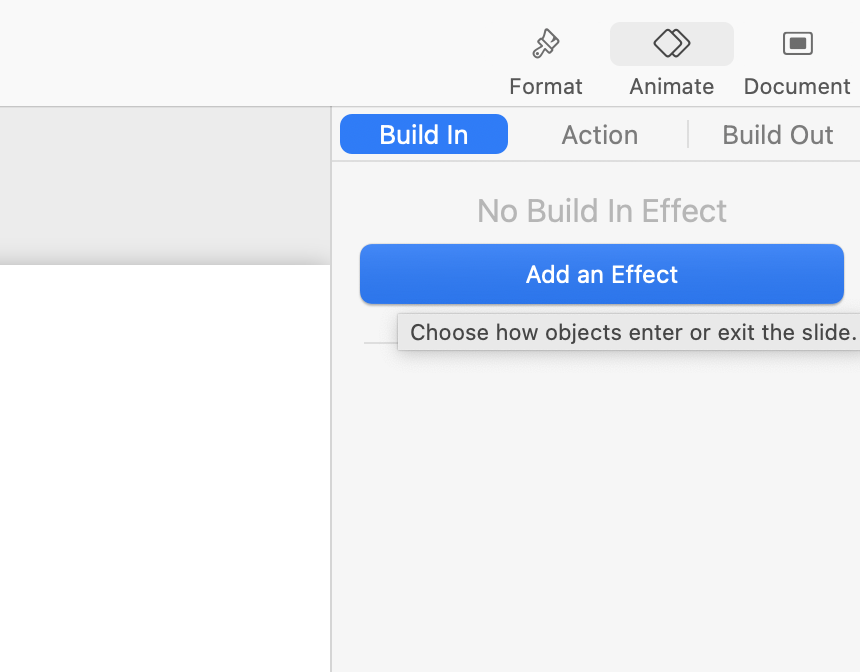
I’m not going to go into too much detail here since it’s pretty self explanatory and there are a lot of other resources out there for learning how to do basic animations in keynote. Keep an eye on how the animations start though, the default of “onClick” will require you to click before it advances… this is ok sometimes, but if you have multiple chained animations, you typically want them to trigger automatically.

Click on the Build Order button on the bottom of the right hand panel to see all of the animations you add. This is a great place to control the overall flow of the animation.
Magic Animations
Some animations are tricky such as changing from one color to another. Keynote has an amazing little transition called Magic Move where they will animate the change between 2 slides.
- Create a shape on a slide
- Duplicate the slide
- Change the size and color of the shape on the second slide
- Go back to the first slide
- Click the animate tab
- On the transitions tab, click add effect
- Click on Magic Move (adjust settings as needed)

Note: this is also great for moving various pieces around the screen
Advanced Animations
Animations is an infinite rabbit hole. It’s probably best to stick with the simple things and not to go overkill (like I did). If you really must though, here are a few pointers/tips that might help. This really could be its own huge blog post, but since animations are just one very small part of a good capstone presentation/writeup I figured I should keep this section brief. Feel free to reach out to me if there is something specific you saw in the Ekko writeup that you are trying to replicate.
The coordinates are your friends
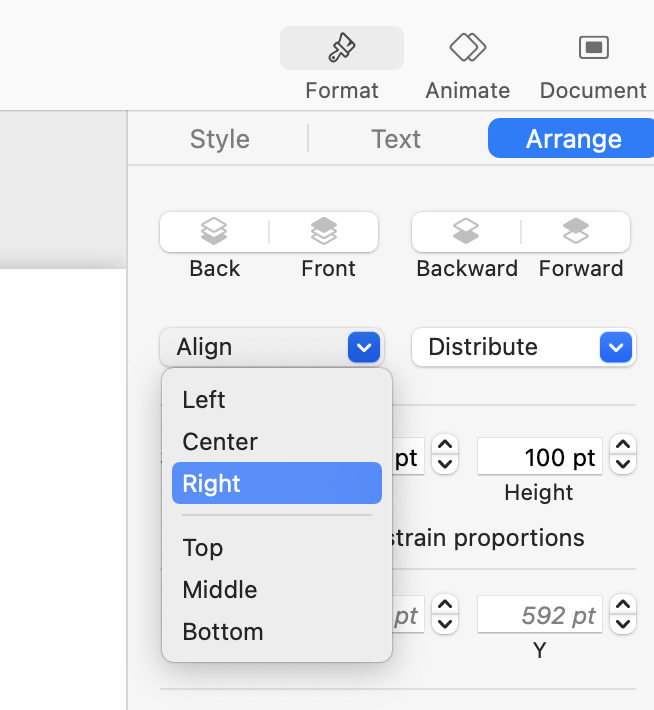
Anytime you click on an element in keynote, you can find (and set) the exact size and position of the element. This can be found under the format > arrange tab. If you want to make some crazy complex animation, it is important to have complete control over where elements are placed.
Use the alignment tools
If you select multiple elements (using shift+click), you can align them as a group. This is extremely helpful in making sure everything is where you want it
Hiding Elements
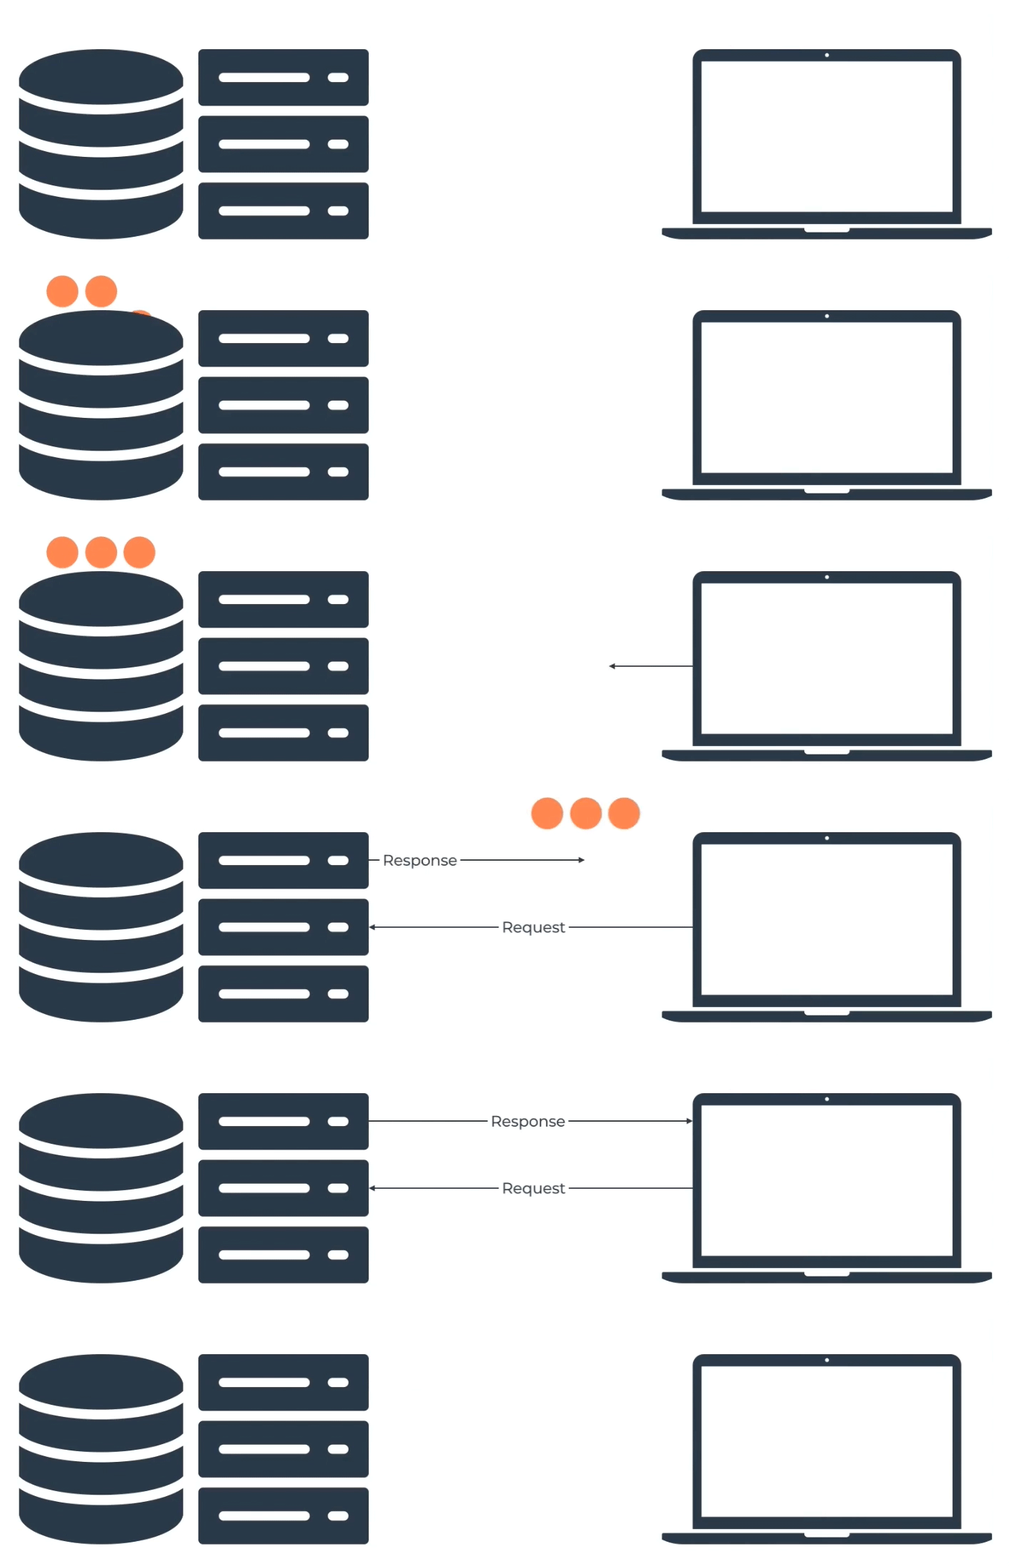
If you want an element to “slide out” of a random spot, it is often helpful to setup the animation however you want, then put a box on top of the starting position to “hide” it till you want to see it. This is how the below animation was done. The arrows were the bottom layer, there was a white box on top of each of them, then the icons were the top layer. When the arrows move animation triggered, they “slid” out from under the white boxes
Looping Animations
For the presentation it doesn’t really matter if animations loop. When you get to the writeup/website and you are exporting the animations from keynote, it’s not a bad idea to add slides & animation steps to make the whole thing loop better. In our presentation, the above animation didn’t “retract” the arrows at the end. I added this when working on the website so the animation would loop better.
Path Animations
Most of the complex animations we ran ended up with involved movement along a path. Basic movement is easy enough using the “move” animation… but things get tricky when you want to move the element on a complex path, not just a straight line. (Full disclosure, this is probably the point of diminishing returns. It is probably more trouble than it is worth to get too deep into this area).
- Make a series of move animations on the same element
- remove the “ease in” and “ease out” to allow the whole movement to be continuous (instead of pausing at each destination point)
- add all the coordinates for the various destination points to an excel sheet
- bust out the good ol’ soh-cah-toa to figure out the distance between each point (not necessary if you have no diagonals)
- set the speed you want for the first section
- use the previously calculated distances to calculate how fast the element should move to each destination
Exporting Animations (first pass)
If you want to use these animations in your writeup, you’re going to need to figure out how to get them outside of keynote.
gif vs. video
I’m not going to beat around the bush, you should probably plan on exporting your animations as videos instead of gifs. I know that gifs are the OG animation format, but they are obnoxiously big. Our group spent a few days doing all sorts of weird stuff with ImageCDNs, delayed loading, and other weird stuff, but websites really don’t want to have hundreds of megabytes worth of animated gifs, and compressing them down often leads to really ugly looking shadows of their original glory. If you’ve only got a couple, it’s probably fine, but video support across browsers is really good (especially when your target audience is people in the tech world), so I recommend sticking with video across the board.
Exporting Options
tl;dr use option 1 if you want the easiest path and option 3 if you want the best quality. Use option 2 if you want your website to load slowly.
Option 1: Screen capture
You can simply use the built in mac video capture ability by clicking cmd+shift+5
Pros: fast, easy, allows for trimming clip, saves as video
Cons: You’re stuck with the resolution on your screen, if your computer is lagging you might see weird artifacts in your screen capture, and it’s hard to get a super exact capture window
Option 2: Export as .gif
Keynote really is fancy. They have a built in export to gif tool. Feel free to dig into this a bit, it’s a pretty nifty ability. I still recommend against animated gifs, but it’s nice to know this exists. Keep in mind that they will always be exporting the entire slide.
Pros: keynote is fancy
Cons: always end up with the whole slide, its a gif 🙁
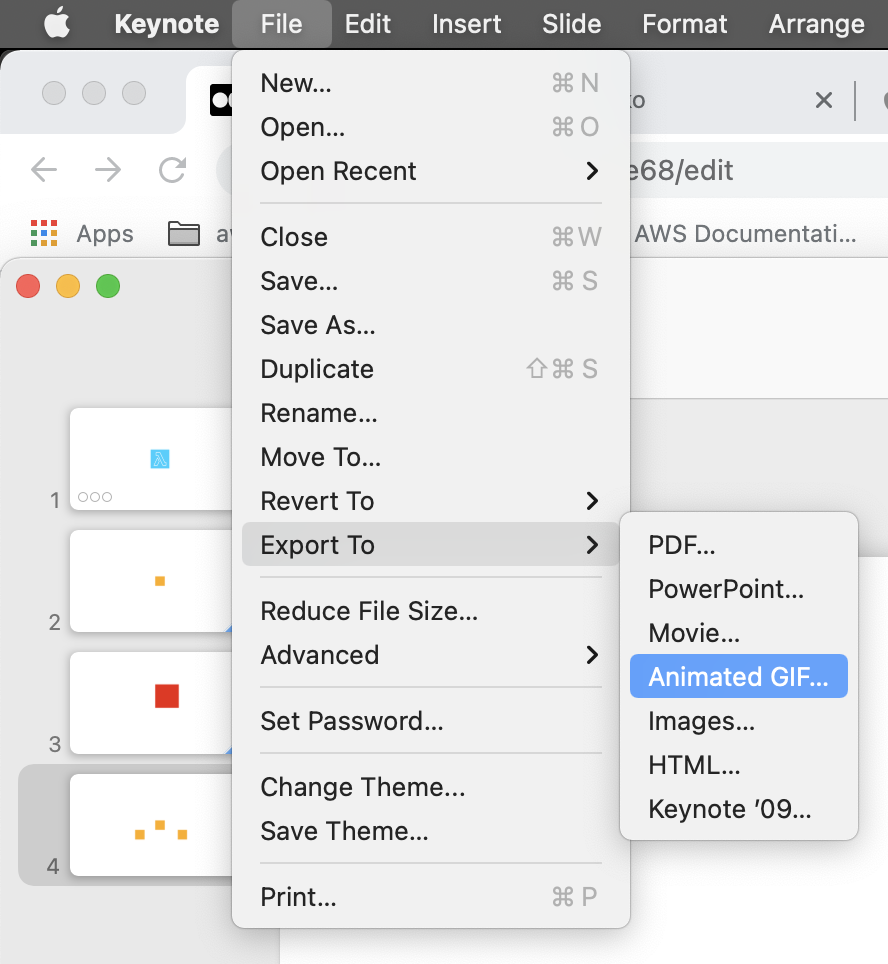
Option 3: Export as mp4
Keynote also has the ability to export as an mp4 🎉 This is flippin amazing! And honestly, this is pretty much the best way to do it if you don’t mind the few extra steps required to deal with having the whole slide exported. Definitely will result in the best quality
- Make sure you select the single slide you want to export (if you have multi-slide animations such as the magic move one, go ahead and do however many slides is required)
- I personally set the “go to next slide” and “go to next build” to 0 and handled the timing of animation triggers and slide transitions in the animation pane.
- You should probably export as 720 or 1080… but one thing that is really cool is that you can export at whatever resolution you want, so you can make a small animation on your slide much larger without sacrificing sharpness etc.
Cropping Animations
Regardless of which export option you chose, there is a decent chance that you’ll want more granular control over how the image is cropped & sized. This is where photoshop comes into play.
- If you are on an m1 mac, you might have to run photoshop through rosetta and not use the m1 version of photoshop since it is missing a few features.
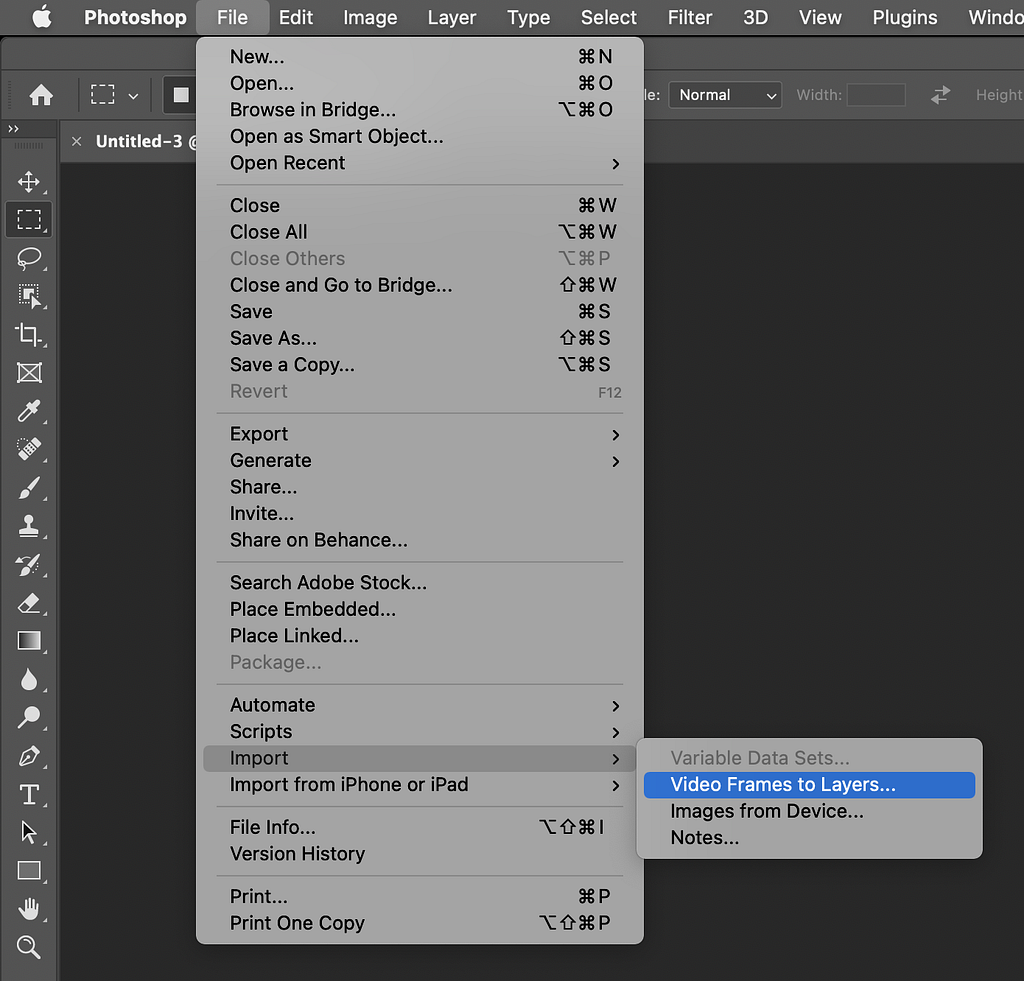
- If you are cropping a gif, simply open it in photoshop. If you are cropping a video, import the video frames to layers.
3. You can technically freehand the crop tool, but I prefer to have more control.
4. Select all with cmd+a
5. Select the magic wand tool
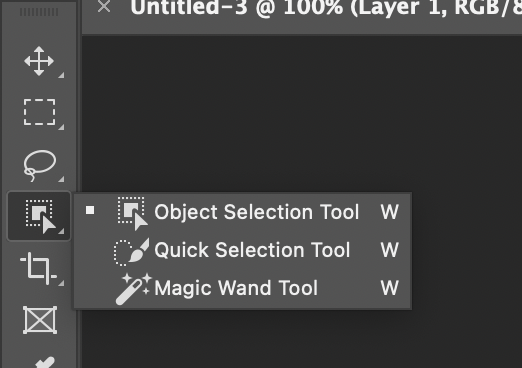
6. Hold down option so a minus symbol appears next to the wand
7. Click on the background to “remove” it from the selection
8. You should just have your icon/graphic selected now. If there are weird extra bits still selected, you probably need to bump up the tolerance of the magic wand and try again so it is not so sensitive to subtle color changes. Note how the marching ants are just around the shapes I want
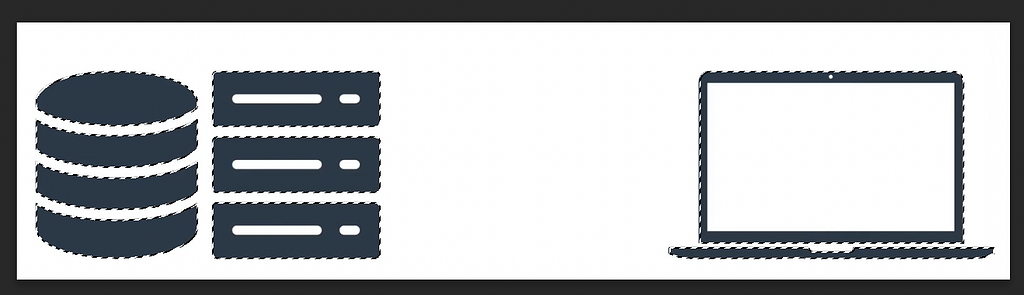
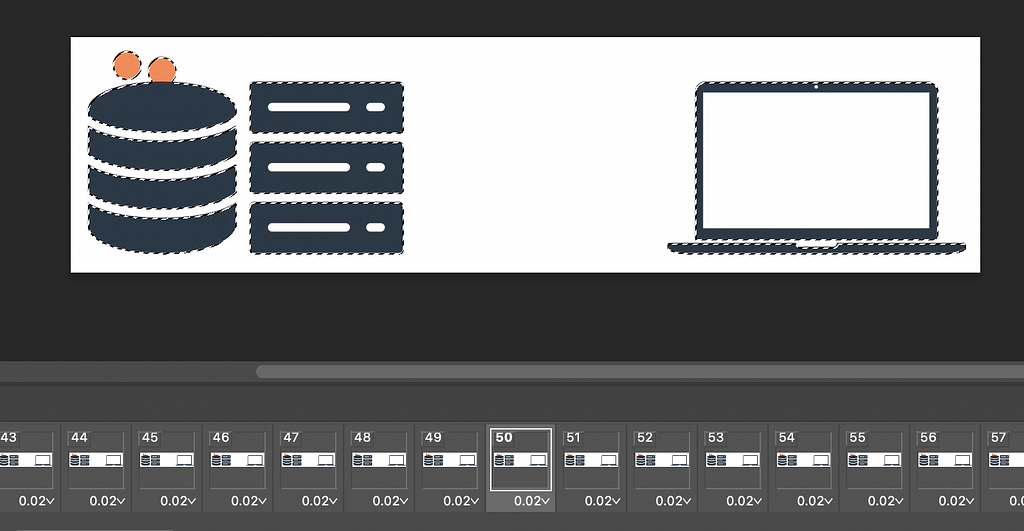
9. One thing to be careful about is if the animation goes outside of this “starter slide”. This animation has circles move above the computer, so this would actually not work. To fix this, click cmd+d to deselect everything. find the slide that has the “further out” animation bits in the timeline (if this isn’t on the bottom of your screen, change to the animation layout under window). click “v” to get the selection tool. Click on one of the further out elements to select the layer they are on. Repeat the above steps to select.
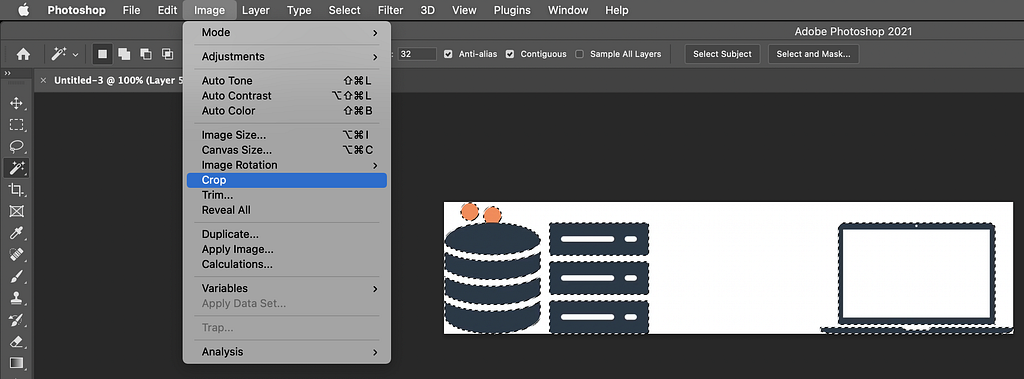
10. With the proper bits selected, go to image > crop to crop the image down to the selection
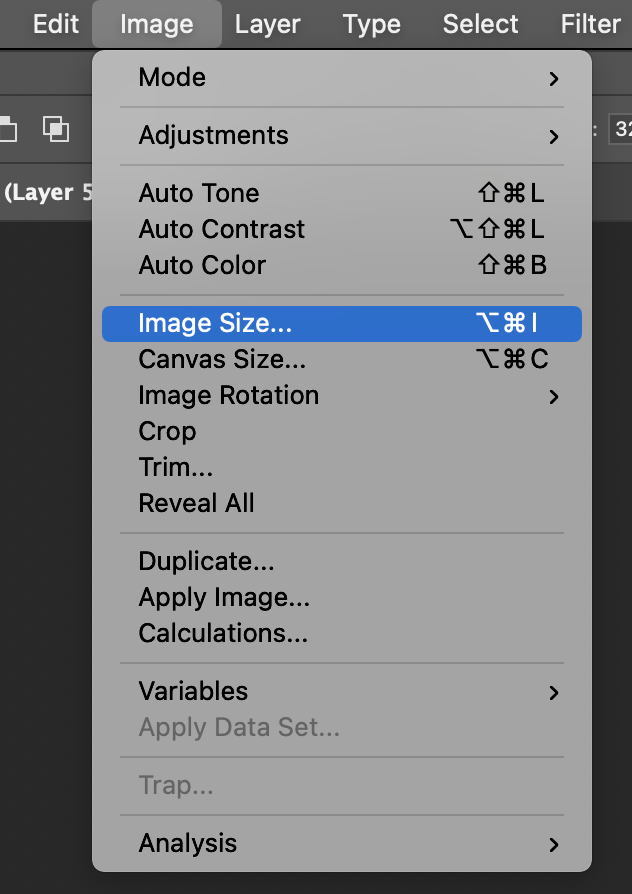
11. This isn’t directly tied to cropping, but now is a great time to resize your animation to the exact dimensions you want. As small as possible but as large as needed.
Exporting Animations (second pass)
Export video
Use photoshop’s export > render video to export video
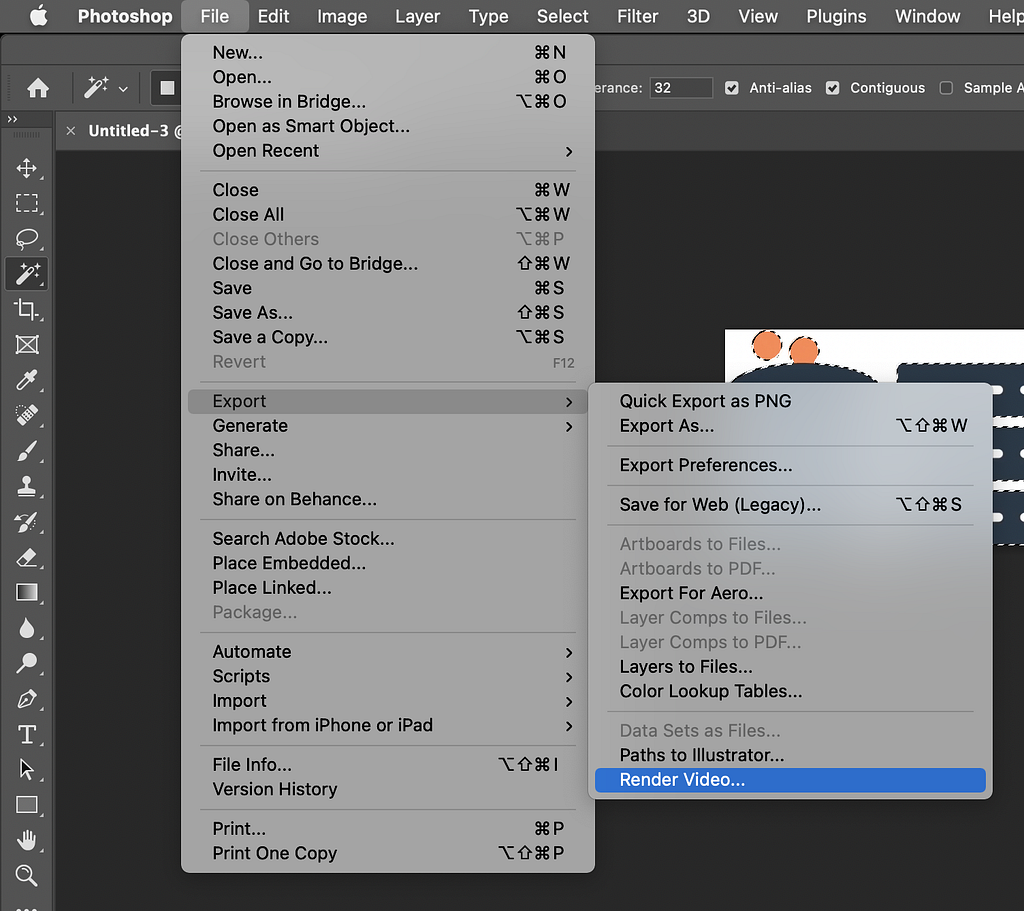
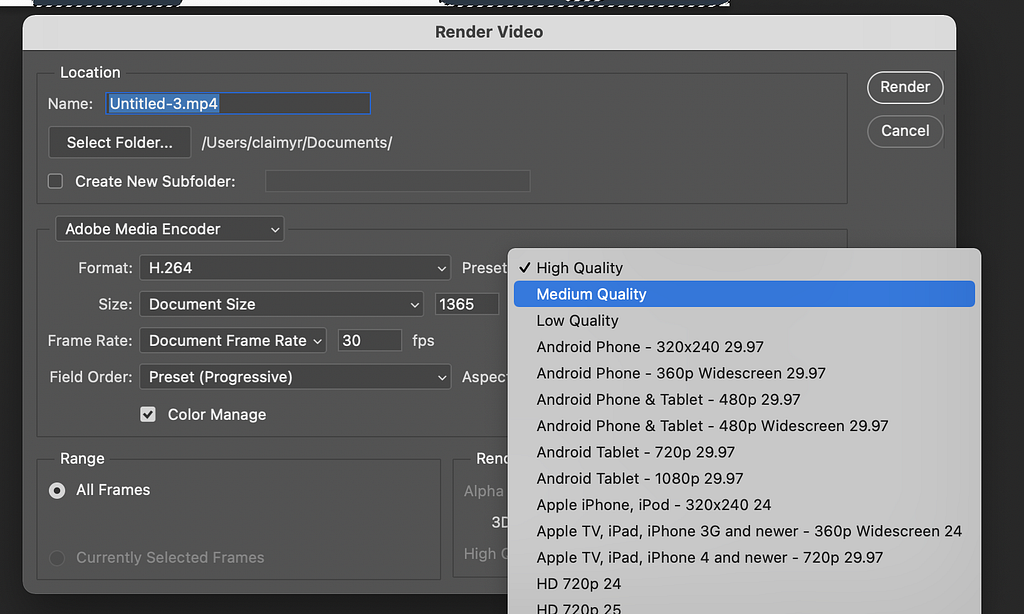
You want to end up with an mp4. I’d start with the default setting and do a couple test exports. You can try messing around with lower quality presets if you want a smaller size
Export gif
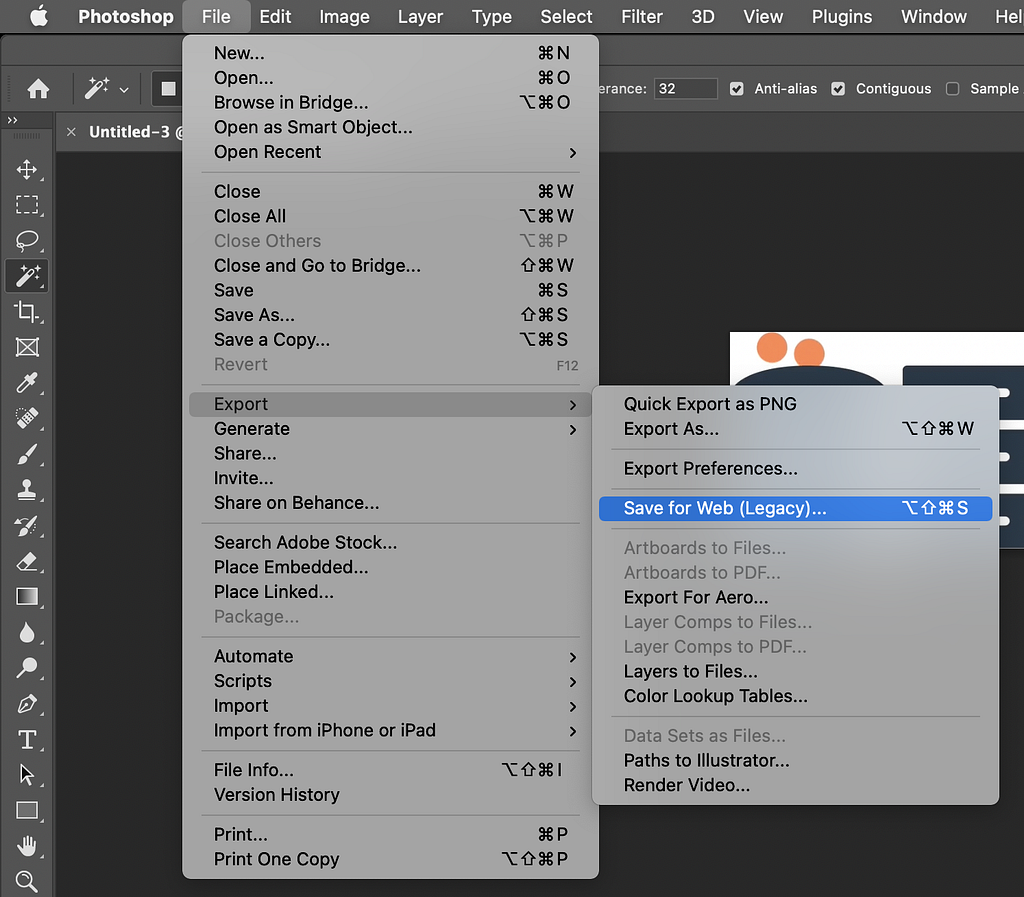
If you must export a gif, you can do so from Photoshop’s Save for Web (Legacy)
Using Animations
We used this simple markup to get the video to behave like a gif
<video autoplay loop muted playsinline>
  <source src="video-path.mp4" type="video/mp4" />
  Your browser does not support the HTML5 Video element.
</video>
AHHH, I made too many animations and things are laggy!!! How to solve this problem with more problems… or in other words, a not-recommended way to mitigate performance issues created by going completely overkill on your presentation’s animations.
I might have gone a bit overboard on our presentation and ended up with so many complicated animations that my computer started lagging. This was super noticeable when I was also running zoom to share my screen. The crazy solution we came up with that worked (but was a little ridiculous), was to rent a mac from macStadium (I’ve also used macInCloud in the past which probably would’ve worked too). This gave us a more powerful mac that also had a crazy fast hardwired internet connection in a central location. This was actually also helpful for all of the animation exporting and rendering that was bogging down my computer.
Final (overkill) setup for our presentation
- I used my personal computer to talk during my part of the presentation
- I used my personal computer to control the remote mac over vnc (used to advance slides/animations)
- Loaded presentation onto rented mac
- Had the rented mac also join the zoom call as a presenter
- Shared screen of rented mac during presentation
I definitely don’t recommend this since it’s not unlikely that something ends up going sideways and everything could blow up. It’d probably be better to avoid super complex animations.
Good luck, and don’t hesitate to ping me on slack if you have any questions
Originally published on Medium.